*Question functionality currently disabled
22 February 2018 Question by: Rapid Customer
Q. Can this be used with a genie 18 motor board?
A. Hi Harry, thank you for your question. Please see the data sheet for usage instructions. It's mainly for the project boards as far as we can tell.
18 March 2015 Question by: Rapid Customer
Q. Hi, where exactly can the program for the Genie LCD Display be found or can you give me the link to where I can purchase a new Genie LCD Chip.
A. Hi Andrew. Thank you for your question. The code would depend on what the screen was being used for. Please see the data sheet for information regarding the connections and which controllers and the coding to be used in all in the data sheet.
27 October 2014 Question by: Rapid Customer
Q. where can i get the program code that goes with this
A. Hi, thank you for your question. The data sheet can be found here and the software can be found here.
01 April 2014 Question by: Rapid Customer
| Product code: 13-6026
Q. Where do I put the battery as it has red and black wire. But in the instructions it doesn't say where they need to go.
A. Hi Ryan. Thank you for your question. The red wire goes to the positive (+) and the black wire goes to the negative (-).
19 September 2013 Question by: Rapid Customer
| Product code: 13-6026
Q. I am wondering if I could get a data sheet for the actual LCD used in this product, I would like to compare its PIN Function with other displays.
many thanks
A. Hi Stephen. Thank you for your question. Please see the data sheet for the requested LCD.
24 April 2013 Question by: Rapid Customer
| Product code: 13-6026
Q. what are the dimensions of the whole product, including the PCB
A. Hi Sam. Thank you for your question. The dimensions are 92mm x 45mm x 15mm.
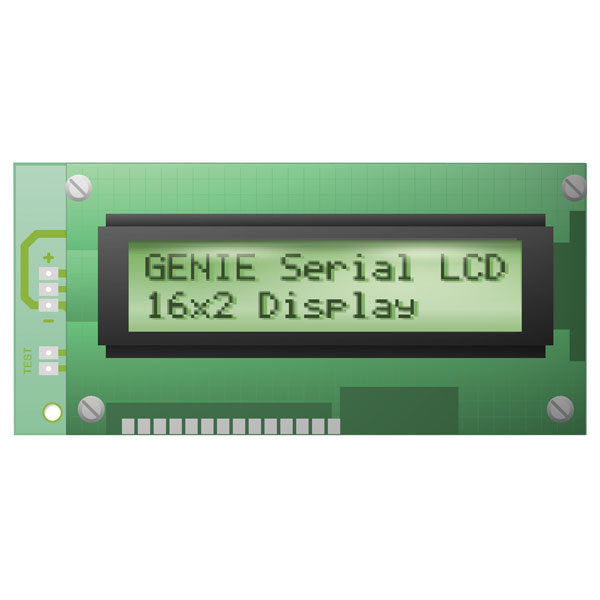
14 February 2013 Question by: Rapid Customer
| Product code: 13-6026
Q. What are the dimensions of the black border area around the screen?
A. Hi Adam. Thank you for your question. The black outer surround is 25mm x 73mm. The screen window is 16mm x 61mm within it.
11 November 2012 Question by: Rapid Customer
Q. How can I activate the back light in the GENIE LCD so that it can viewed from a distance?
A. Hi Declan, Thanks for your question.
The supplied LCD with the Genie is not backlit – you can however use a different LCD with the back board, and the backlight is powered from the board when such a display is used.
17 June 2012 Question by: Rapid Customer
Q. I have used 3 LCD displays(tested and contrast set) on a E18 project board and connected it via 3 positive output pins, however it doesn't work.
Could you please advise why it doesn't work?
And how can I go about getting it working?
Thanks for your help Andrew
A. Thanks for your enquiry Andrew. We've investigated this problem and the problem likely lies with the screen contrast. You will need to adjust the contrast of the display using the control on the back.
28 April 2012 Question by: Rapid Customer
Q. Can this LED Display be connected to the E18 Genie IC via a single output pin?
A. Hi Jacob, yes this can be connected to the E18 Genie IC
24 April 2012 Question by: Rapid Customer
| Product code: 13-6026
Q. Can it be controlled via the control device option in circuit wizard?
A. No, the control device option will only set High or Low level not provide the more complex programming required for this unit.
02 April 2012 Question by: Rapid Customer
Q. Do you stock the ribbon cable that is needed to keep the PCB and display separate?
A. Hi Kate, unfortunately we don’t currently offer a ready made cable that will do this – however you could use a 14 way ribbon cable such as 01-0171 – but it is 30.5m long.
29 February 2012 Question by: Rapid Customer
| Product code: 13-6026
Q. Is it possible to connect a Genie chip to any other backlit LCD display?
A. Thanks for your enquiry Bill. This particular module has been constructed so that the PCB backplate accepts the data lines in the correct order. There is no reason why another display could not be used but care must be used to ensure the display input lines are correctly connected to the appropriate pins.
22 February 2012 Question by: Rapid Customer
| Product code: 13-6026
Q. How big is the LCD screen itself, including the black plastic that surrounds it?
A. Hi Jack, thanks for your question. 57-0911 is the screen used, please see the data sheet link below for dimensions:
https://www.rapidonline.com/pdf/57-0911.pdf
24 January 2012 Question by: Rapid Customer
| Product code: 13-6026
Q. I think i've lost the instructions sheet where it tells you where to put the components. So i don't know where to solder what yet. I am using this on my electronics project in y11 so please can you hel me?
A. Hi Jack, thanks for your question. Please refer to the datasheet for more information, this will help you with what you need https://www.rapidonline.com/pdf/13-6026.pdf
09 January 2012 Question by: Rapid Customer
| Product code: 13-6026
Q. What size is this product?
A. The unit is 83L x 44W x approx 14mm (assembled) (please note that the thickness is an estimate)
19 October 2011 Question by: Rapid Customer
| Product code: 13-6026
Q. can this be used on a co8 activity board?
A. Hi Alistair, thanks for your enquiry. Yes this module can be connected to the CO8 board. Select output 'G2' for the serial signal.